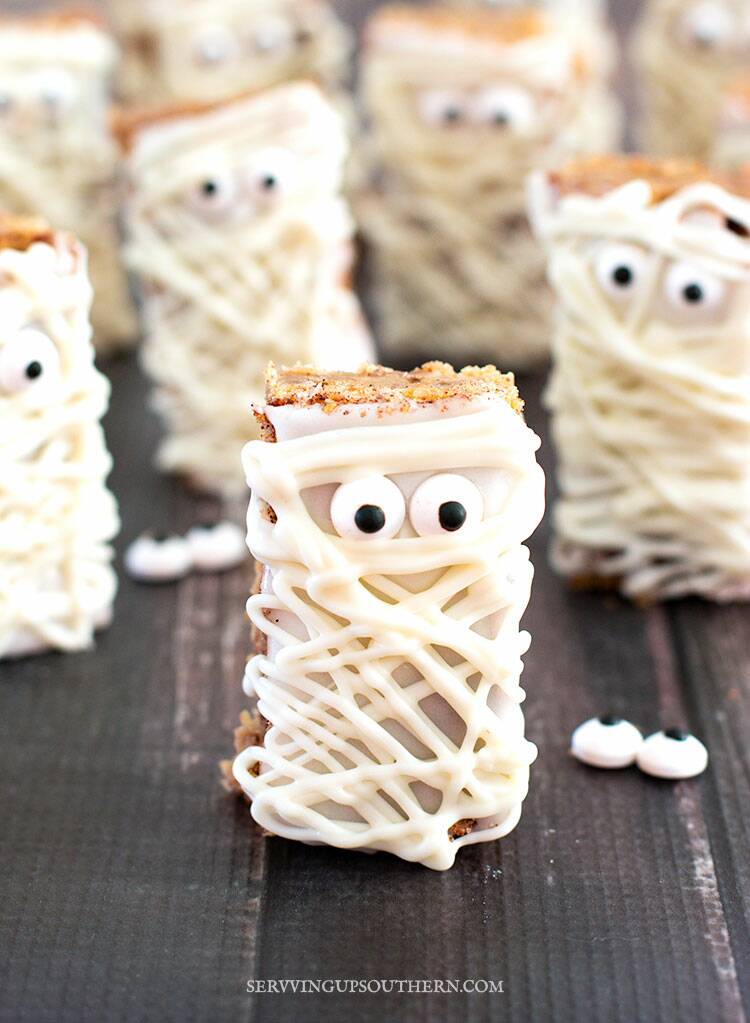
These little Mummy Halloween Treats are so stinking cute. See in this post how to make these for your next party.
Aren’t these Mummy Halloween Treats the cutest? I don’t usually do a whole lot for Halloween, but I do enjoy making Halloween-themed treats. There are so many cute things to make.

I can’t take the credit for these adorable little Halloween treats, though. My daughter, Megan, made these for my granddaughter’s Pre-K class party tomorrow. They are just too cute not to share.
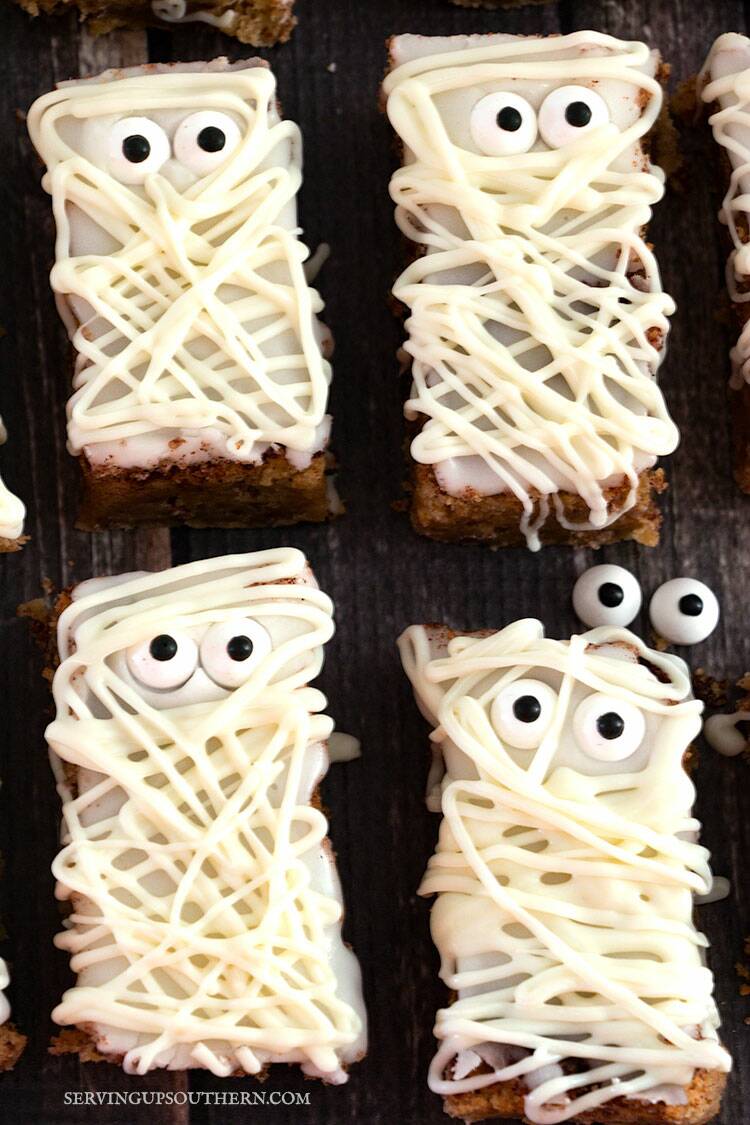
She made these using my snickerdoodle blondies recipe. The bars were perfect because they already have a white glaze on them. All she had to do was add some candy eyes and drizzle white chocolate over each one to make the mummy wraps.
What do you need to make these Mummy Halloween Treats?
It’s really pretty simple.
- Dessert bars (brownies, blondes, etc.)
- White chocolate
- Vegetable oil (Olive oil should work too!)
- Candy eyes
How do I make the cute little mummy treats, you ask?
- Start with a bar recipe of some kind (here’s mine again) and bake according to directions for the bars you choose.
- Melt the white in the microwave and stir in the vegetable oil
You’ll place room temperature bars in the refrigerator or freezer for a few minutes before you drizzle the chocolate. This helps the chocolate set up quicker so that it keeps its form.
As you work, if you find that the chocolate doesn’t hold it’s shape, you can stick the bars back in the fridge for a few more minutes between every so many bars.
Here’s a little tip from Megan: if you need to cool the bar treats during the drizzling process, place the bag of chocolate in a shallow bowl of warm(ish) water to keep it from getting hard until you’re ready to start again.
Here are some other fun treat ideas you might enjoy.
What are your favorite Halloween treats to make? I would love to know. :)
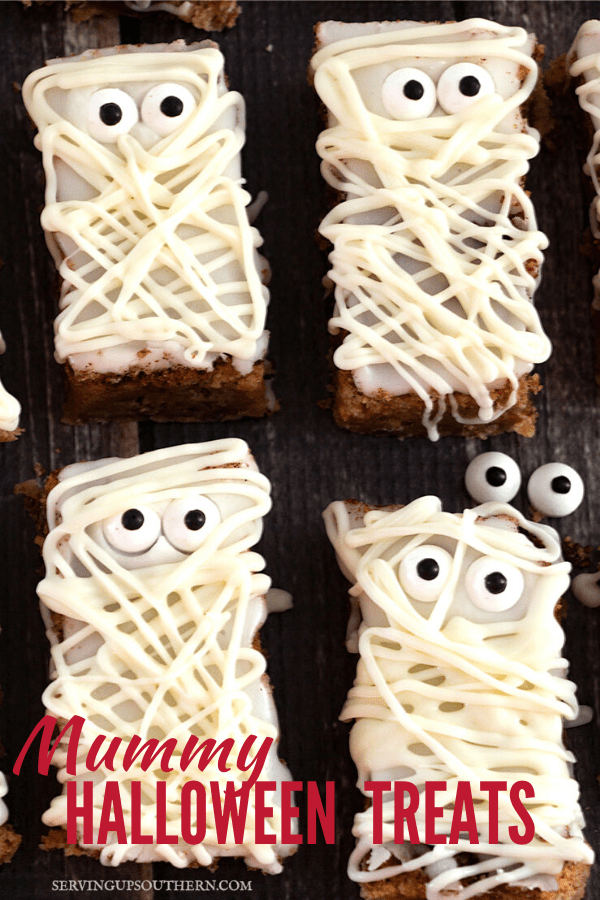
Mummy Halloween Treats
Ingredients
- 1 1/2 cups white chocolate
- 1 tsp cooking oil
Instructions
- Cut the bars into rectangular shapes and place individual pieces on a large plate or platter and set in the fridge or freezer for a couple of minutes.
- While the bar treats are cooling, melt chocolate and oil in a microwave-safe bowl. Microwave for 1 minute. Stir and return to microwave for 15-20 second intervals, stirring in between until chocolate is completely melted and smooth.
- Spoon the melted chocolate into a ziplock bag and snip a tiny section off of one corner of the bag.
- Using a little dab of icing where you want the eyes and place candy eyes on those spots.
- Drizzle icing over each bar in a random pattern to create the look of mummy wraps.
- Return mummy treats to the fridge/freezer for a couple of minutes.
- If not serving immediately, you can store these in an airtight container for up to 1 week.
Notes
Disclaimer: Nutritional values (per serving) are approximates only and will vary based on cooking methods and brands of ingredients used.
© SERVING UP SOUTHERN. Content and photographs are copyright protected. Sharing of this recipe is both encouraged and appreciated. Copying and/or pasting full recipes to any blog post or social media is strictly prohibited.


These are so adorably cute!! They had to be a hit at the class Halloween party.
Hi Paula!
Aren’t they, though? The party is today, so we’ll find out. ;)
>>> Kim
Absolutely darling! And they look yummy too! Pinned!
Thank you, Debbee!
They are yummy! Thanks for pinning!
>>> Kim
Oh you’re right Kim – those ARE the cutest!! I bet your granddaughter and her fellow students will love them! Thanks for the tips from you and Megan too!
Hi Barbara!
Aren’t they, though!? It sounds like they were a big hit! Thanks so much for stopping by!
>>> Kim